Picking
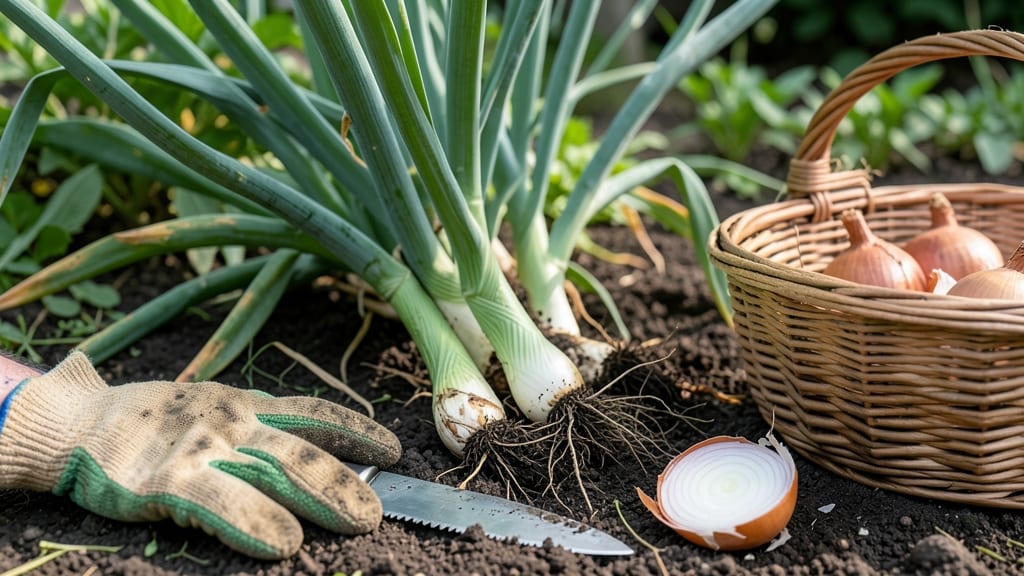
Harvesting onions from the garden at the right time ensures perfect flavor, size, and storage potential — and missing that window can mean tough, pithy bulbs or wasted effort.
Picture this: you’ve nurtured your 🧅 onions all season, only to pull them too early and end up with small, underdeveloped bulbs, or leave them too late and watch them split or rot in the soil.
The difference between a great harvest and a disappointing one often comes down to timing.
Most gardeners in Zone 6a know the general window is July to August, but the exact moment depends on leaf color, bulb firmness, and even your local climate. Below, I’ll walk you through the foolproof signs to watch for, plus how to adjust for early or late harvests.
You’ll also learn how to cure and store your onions for maximum shelf life, so none of your hard work goes to waste. Let’s get those bulbs out of the ground at the perfect moment!


How to test soil and determine the perfect harvest time for onions
Determining the perfect harvest time for onions starts with understanding your soil conditions and recognizing key visual cues. Onions thrive in well-draining, slightly acidic soil (pH 6.0–7.0), and harvesting at the right moment ensures maximum flavor and storage life.
Before pulling any onions, test your soil and observe the plants closely—these steps will guide you to the ideal harvest window.
Start by conducting a simple topsoil test to check moisture and nutrient levels. Stick your finger about 2 inches deep into the soil near your onions. If it feels dry but not bone-dry, your onions are likely ready to harvest.
Overly wet soil can lead to rot or poor bulb formation, while dry soil signals it’s time to pull. This test is especially critical for long-day onions, which need dry conditions to sweeten properly.
A soil pH test is equally important. Onions prefer a slightly acidic to neutral pH, and imbalances can stunt growth or cause disease. Use a home soil test kit (available at garden centers) or send a sample to a local extension office for precise results.
Adjusting pH with lime (to raise) or sulfur (to lower) before planting ensures healthier bulbs and better harvest timing.
Now, let’s focus on the plants themselves. The most reliable harvest readiness signs are visual cues tied to leaf and bulb development. For green onions (scallions), harvest when the leaf stalks reach 6–8 inches tall and the bulbs are pencil-sized.
For mature onions, wait until the tops yellow and flop over—this signals the bulb has fully matured and stored nutrients.
Here’s a quick reference for harvest timing based on variety and growth stage:
| Variety | Harvest Time | Key Signs | Soil Condition |
|---|---|---|---|
| Green Onions (Scallions) | 6–8 weeks after planting | 6–8" tall, small bulbs | Moist but well-draining |
| Short-Day Onions (e.g., Texas Early White) | 90–100 days after planting | Tops yellow and fall over | Dry soil encourages sweetness |
| Long-Day Onions (e.g., Yellow Sweet Spanish) | 120–150 days after planting | Bulbs firm, papery skin forms | Stop watering 1–2 weeks before harvest |
| Storage Onions (e.g., Red Baron) | 100–120 days after planting | Neck tightens, tops dry completely | Well-drained, slightly dry |
For green onions, you can harvest multiple times by cutting the outer stalks 1–2 inches above the soil. This encourages regrowth, giving you a continuous supply. However, mature onions should be harvested all at once to avoid splitting bulbs or attracting pests.
Use a sharp knife or garden fork to lift onions gently from the soil, shaking off excess dirt.
One of the biggest mistakes gardeners make is harvesting too late, which leads to overmature onions that split or rot. If left in the ground after the tops have fully browned, bulbs may absorb excess moisture and become soft.
Conversely, harvesting too early results in small, pungent onions that lack sweetness. Aim for the sweet spot where bulbs are firm, tops are yellowing, and the neck begins to tighten.
After harvesting, let onions cure in a dry, shaded area for 1–2 weeks to develop their papery skin and sweet flavor. Avoid washing them until just before storage or use.
Proper curing is critical for long-term storage and preventing spoilage. Store cured onions in a cool, dark place with good airflow, like a mesh bag or ventilated container.
Regional climate plays a role in harvest timing too. In warmer climates (Zones 8–10), onions may mature faster and benefit from fall planting to avoid summer heat stress.
In cooler climates (Zones 3–6), focus on spring planting and watch for first frost dates—harvest before temperatures drop below 40°F to prevent bulb damage.
By mastering soil testing and recognizing harvest readiness signs, you’ll enjoy onions at their peak flavor and texture. Whether you’re growing green onions for quick snacks or storage onions for long-term use, timing is everything. Happy harvesting! 🧅
Onion harvesting timeline: month-by-month guide for best flavor and storage
Timing your onion harvest correctly ensures sweet, flavorful bulbs that store well all winter. Since onions mature at different rates depending on variety and climate, understanding your month-by-month timeline is essential.
Spring-planted onions typically mature in July-August, while fall-planted varieties may be ready in late September-October. The key is watching for visual cues while adjusting for your local frost dates.
For most onion varieties, the harvest window opens when 50-60% of the tops yellow and flop over. This usually happens 100-120 days after planting, but cooler climates may extend this to 140 days.
Stop watering 2-3 weeks before harvest to concentrate sugars and improve storage life. This is especially critical for storage onions like Yellow Sweet Spanish or Red Wethersfield, which need dry conditions to develop their papery skins.
- May-June: Monitor green onion varieties (like scallions) for harvest when 6-8 inches tall. Cut just above soil level, leaving roots to regrow.
- Late June: Begin checking short-day onions (e.g., Texas Early White) for yellowing tops. These mature fastest in warm climates.
- July-August: Peak harvest for long-day onions (e.g., Yellow Granex). Stop watering 2 weeks before harvest to prevent splitting.
- September: Harvest fall-planted onions before first frost. These often mature 2-3 weeks earlier than spring plantings.
- October-November: Cure any late-maturing onions in a dry, shaded area for 1-2 weeks before storage.
Climate plays a huge role in your harvest timeline. In warmer zones (8-10), onions may mature 4-6 weeks earlier than in cooler regions. For example, Texas Early White onions might be ready in June in Southern California but not until August in the Pacific Northwest.
Always adjust your watering schedule based on local conditions—too much moisture before harvest can lead to soft, split bulbs.
Pro tip: Test a few onions early by gently pulling one from the soil. If the bulb is firm, dry, and papery-skinned, it's ready. If the neck is still loose or the bulb feels spongy, wait 5-7 more days.
Overripe onions lose flavor and store poorly, so don't wait too long after the tops fully yellow and collapse.
After harvest, cure onions properly for best storage. Lay them in a dry, well-ventilated spot (like a garage or shed) for 1-2 weeks, avoiding direct sunlight. This toughens the skins and prevents rot.
Store cured onions in a cool, dark place with good airflow—a mesh bag or ventilated box works perfectly. With proper timing and care, your onions can last 6-8 months without losing flavor.
Remember, the sweetest onions come from stopping water 2 weeks before harvest and letting the bulbs dry in the soil. This stress triggers natural sugar production, giving you that rich, caramelized taste we all love. Happy harvesting! 🧅